A few years ago I was invited to go on a photography retreat with some amazingly accomplished photographers. Three days, fabulous food, great photographic opportunities, and long, winding paths through the woods. It was heaven! The last night we were there, some of the photogs set up their cameras to take time lapse photos of the night sky. One of the photographers captured a shooting star. Twice! This Country Path block reminds me of a very unusual and special star.

Template 104 is kind of a diamond-shaped or crystal shaped piece. When I laid it out and started looking at it I realized it’s basically a square with the corners snow-balled. So I decided to do just that!

Here you can see where I laid two squares on top of the large green square and pruned the edges. After I pressed the seams open, I lined up a ruler along the green piece and trimmed the white pieces down to size. I know my description might not make much sense, so look at the rest of the pictures.
For those of you playing at home, I recommend using the templates instead of this method. Technically it worked fine, but I think it would have been better otherwise.
 The center square is surrounded by small blocks. Starting in the top left corner and working in a circle, the placement is as follows: Dark, Medium, Light, Dark, Light, Medium, Dark, Medium, Light, Dark, Light, Medium. I started on the left and right sides, sewed the center two pieces together in pairs and pressed the seams open. I sewed a pair to opposite sides of the center block.
 Then I sewed the four squares along the top and bottom into strips. I used pins to line up and hold the seams in place and sewed the top strip and bottom strip to the center piece.
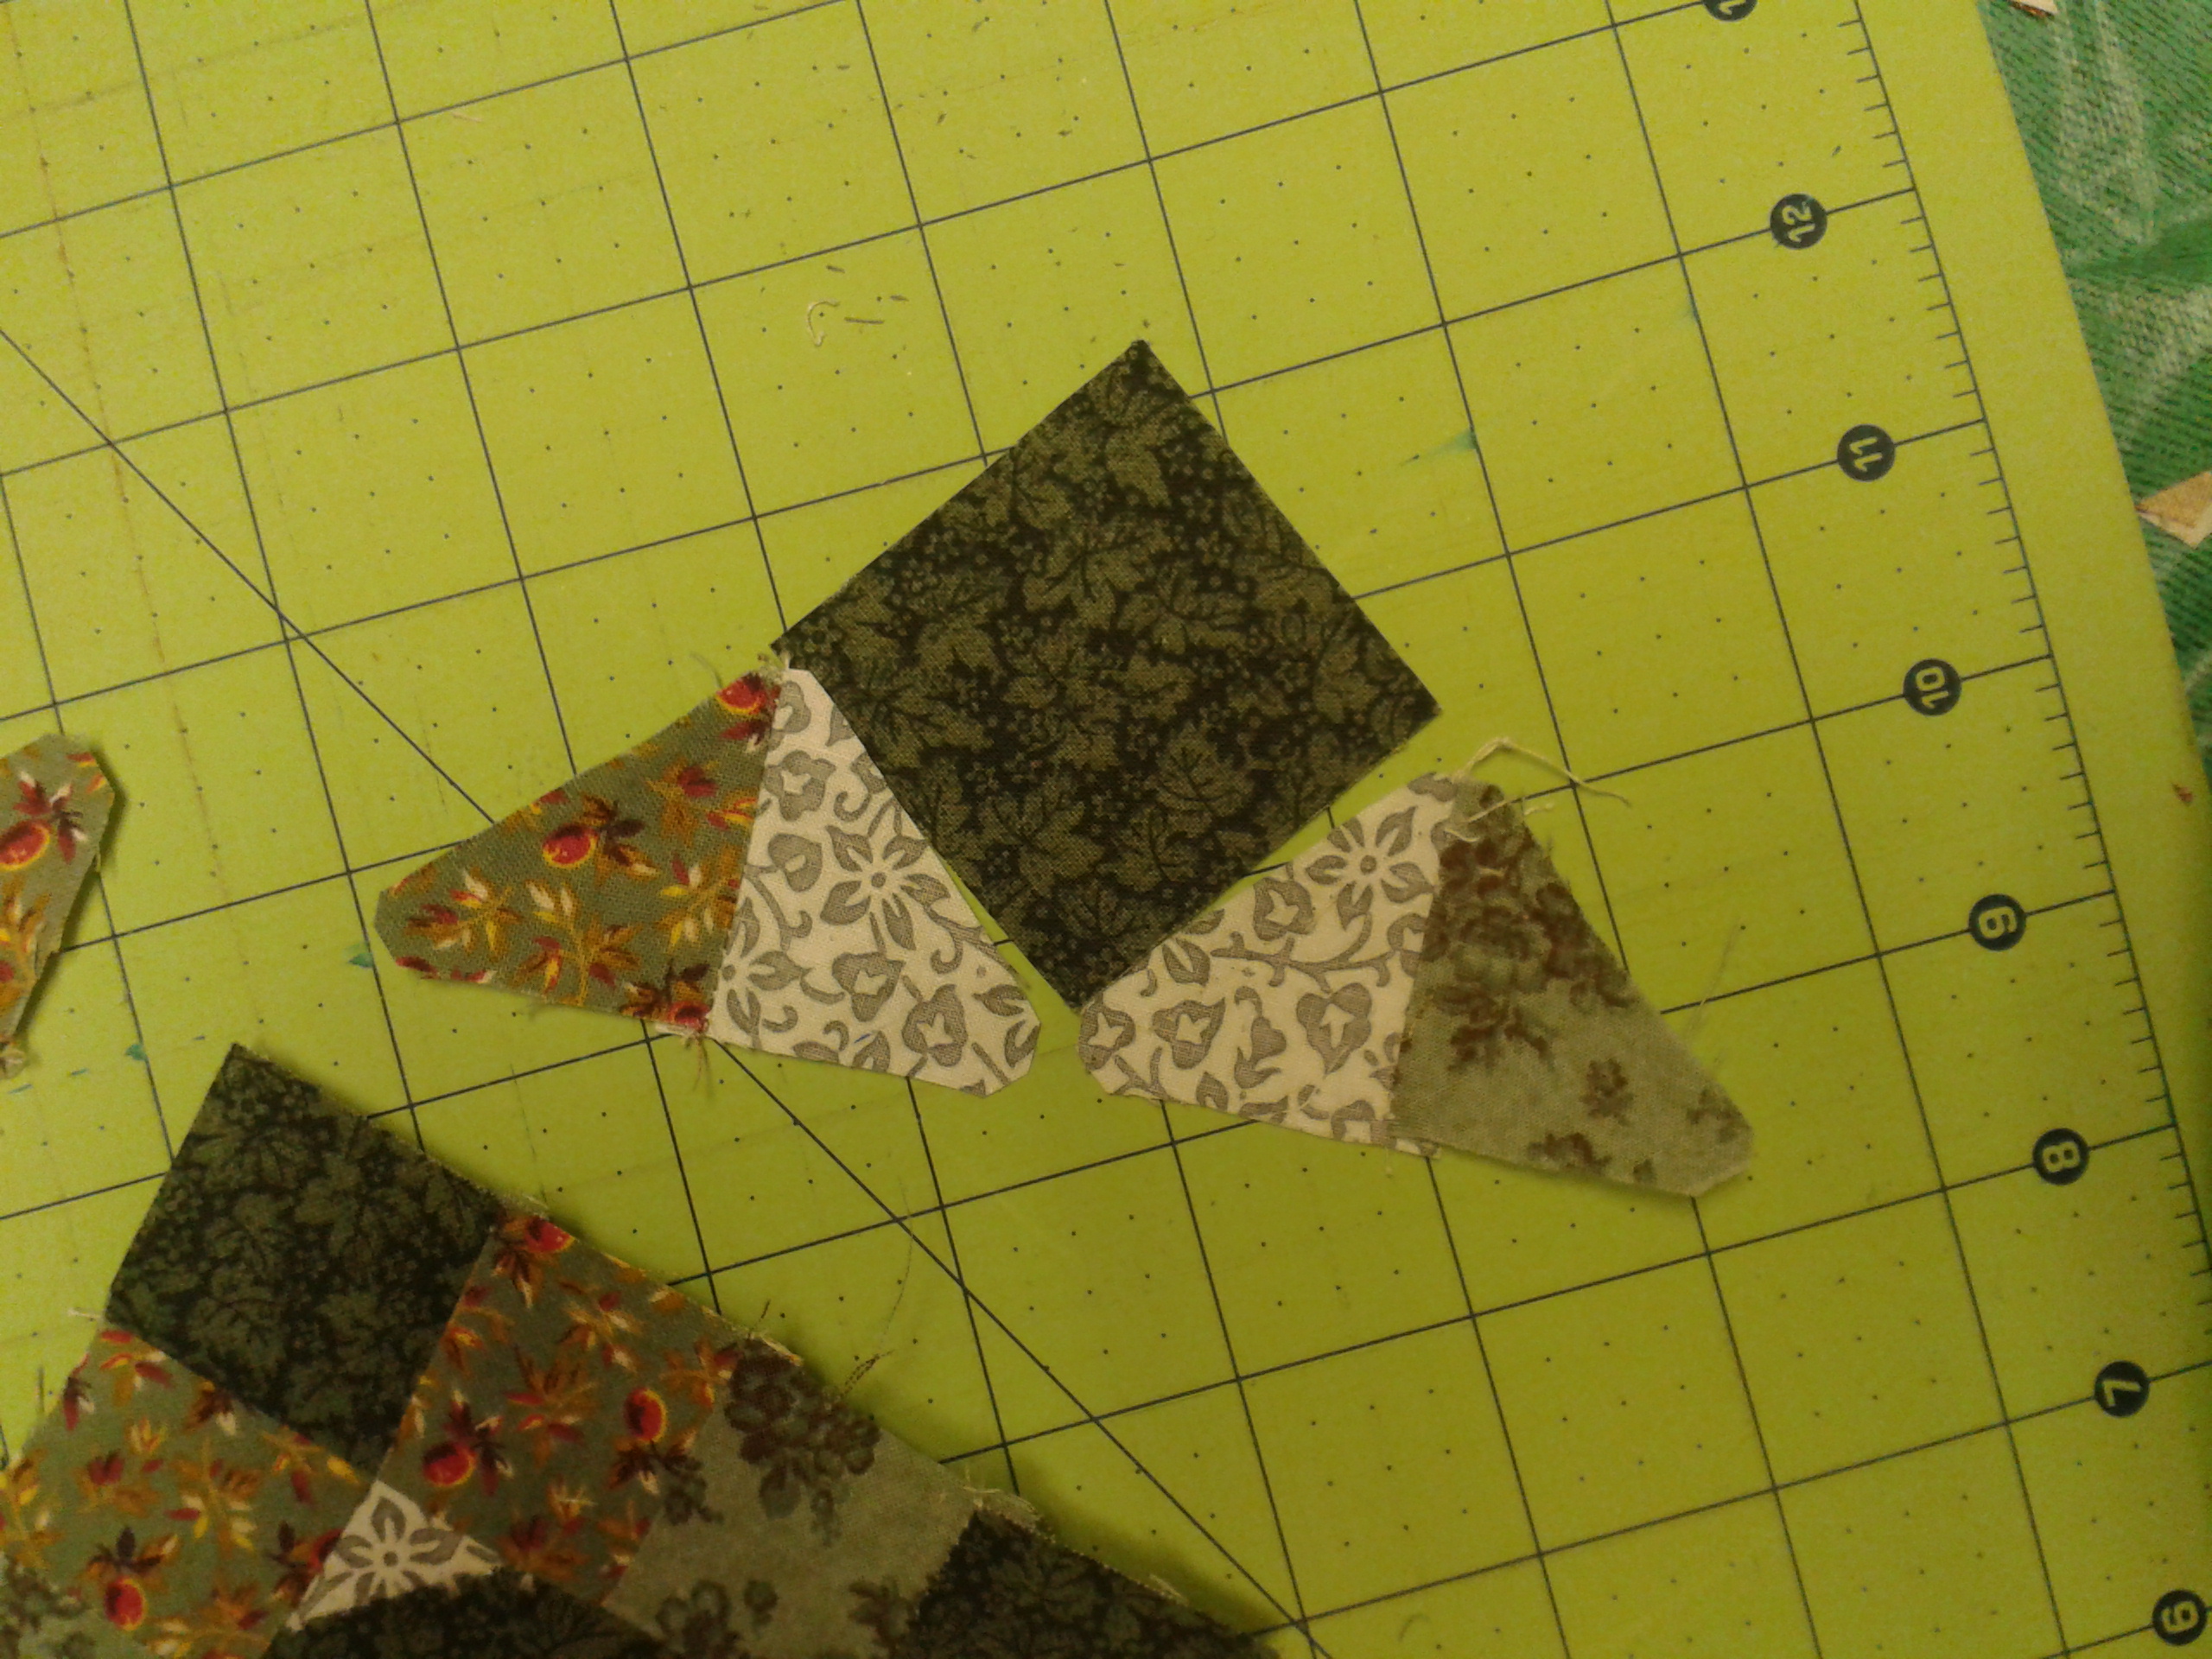 Now it’s time to make the corner units. I chose to sew the triangles together back to back and press the seams open. Then I sewed the long side of the light triangles to the either side of the lower half of the square.
 Now that the corner units are complete, it’s time to attach them to the center. Again, I used pins to hold everything in place and match up the seams. The nice thing about fabric is that it’s forgiving so don’t feel bad if you need to ease it a little bit. I sewed corner units to the right and left side of the block, pressed, then sewed the remaining corner units to the top and bottom.
And here’s our lovely Country Path block, which still reminds me of a star. I like it. I like it a lot.


Mar 20, 2013 @ 00:37:07
I’m gonna try this one today! I really like your choice of colors, Meli. Better than the colors in the book.
Apr 06, 2013 @ 13:20:34
I really love this block… guess I need to buy the book… 😉