Rosebud #75

Leave a comment

My parents have a corner lot with a split rail fence around the yard.  Years ago, mom planted trailing roses at each fence post, and worked hard to train the roses to follow the rails, with mixed results.  Most of them cooperated, some of them never really have.  On May 2, 2004, I got engaged.  After a few days of consulting calendars, Jim and I realized if we wanted to get married that year, it had to be before the month ended!  We tossed out a few dates to the family and settled on the 28th.  A few more discussions and I convinced him to have the ceremony in my parents’ yard.  I knew all those roses would be in bloom and it would be perfect!  I know 26 days is not very long to plan any sort of major event, much less a wedding, but everything fell into place.  Everything!  My dad had concerns that the roses would have bloomed and done before then, but they held off and held off and held off until about 2 days before the wedding, when they suddenly started to burst out all over.  The timing was impeccable.  The day before, I was at the house, and thanked them both for all their hard work to make the yard look so outstanding.  It really was gorgeous.  The day of the wedding dawned bright and clear.  By noon, there were clouds on the horizon.  By 3, dad was glued to weather.com watching a tremendously huge storm cell form right over Provo, Utah, with the rain expected at 6, just as the ceremony was about to start.  We hastily pulled together Plan B, which was to use the large pavilion at the nearby park.  A poster was made and strategically placed, everything needed for the ceremony was moved, phone calls were made to key players (his parents, immediate family, the clergy).  And my mother did something I’ll never forget.  She grabbed a couple of plastic grocery bags, walked the perimeter of the yard, and harvested petals from her trailing roses for the flower girl and flower boy (Jim’s 3 year old nephew called 10 days before the wedding and asked if he could be the flower boy) to scatter down the makeshift aisle at the pavilion.  I can never think about my wedding day without remembering all those rosebuds that waited until the perfect moment to burst into bloom.

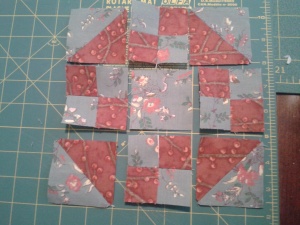
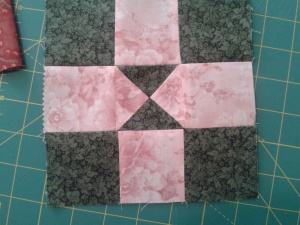
I had to look at this block a looooooong time until I could see the rosebud.  Then I had to lay it all out before I could see the separate components that made it up, and realized it’s a modified pinwheel.

2014-02-01 00.09.24Being a pinwheel, I really wanted to start in the middle and work my way out.  It soon became apparent, however, that first I would need to sew the 8 HST units needed to make the tips of the rosebuds.  Using two contrasting fabrics, I sewed long sides together and pressed the seams open.  Next, I sewed them together in pairs, side by side, with the leaf part of the bud to the left side.  Finally, I attached a background triangle to the left end of the rectangle.


2014-02-01 00.30.35I had decided to be “artistic” and use a lighter shade of green for the tips of the rosebud.  Wish I hadn’t, because they kind of fade into the background fabric.  I sewed the tip sections to side of each of the dark green triangles in order to make the 4 rosebuds.  This effectively created 1/2 of a HST unit.  The other half is made of background fabric.

It just took a couple of minutes to sew together the large HST units and to press the seams.  This yielded the four corner sections of the block, and the basis for our pinwheel.


2014-02-01 00.37.52I sewed the top two pieces together and pressed the seam one direction, then sewed the other two pieces together and made sure the seam pressed the opposite direction.  When I laid the two halves together with right sides facing, the center seam nested beautifully together and it was quick work to sew the two halves together before giving the finished block a really good pressing.

I really do like this block.  But the more I look at it, the more I realize I need to make it again, and make sure the colors don’t merge with the background.  Good thing I need extra blocks for my king-sized quilt!

Ribbons #74

Leave a comment

Ribbons.  I have nothing at all to say about ribbons.  No witty anecdotes, no life experiences.  Nothing.  So we’ll jump right into construction, then, shall we?

2014-01-31 23.17.13This block has 8 diamond shapes (4 of each ribbon color) and 16 triangle pieces in a background color.  To keep myself from screwing it up (unheard of, I know), I laid it all out.  I chose to use two shades green for the ribbons.


2014-01-31 23.34.43I sewed the background triangles to either side of each ribbon piece, long side of triangle to long side of ribbon.  By adding these little wings, I ended up with 8 rectangles.

After pressing the seams (I pressed them open to avoid distorting the fabric), I matched the seams and sewed them together in pairs, light to dark, and pressed them well.  This created four quarters of the block.  I then sewed these together in pairs and gave them a good press.  Watch those seams, peeps!  They’re tricky!


2014-01-31 23.47.53Now take the two halves and match them up so that the zigzags go opposite each other, with the center points meeting in the middle.  One more really good press and there you are.  One finished ribbon block.  I may remake this one with different colors.  It’s kind of fun!

Rainbow Flowers #73

Leave a comment

My mother always had the most amazing garden!  Rhubarb and leaf lettuce in the summer, hundreds of tulips in the early spring, and in the back corner, a large area she called her “English Country Garden.”  Snapdragons, columbines, sweet william and a host of other flowering plants living together in a happy, chaotic jumble, all under the shade of a large weeping willow.  The rest of my mother’s garden, yard, house, and life were all so carefully organized, with everything in it’s place.  But I know she enjoyed the randomness of the back corner.  How do I know this?  She confided to me one day.  To be honest, it’s my favorite part of the yard as well.  The colors of the flowers are all soft and range from pinks to blues to purples to yellows.  I’ve tried to photograph it, but it is truly something that must be experienced.  Even though the overall affect is that of complete randomness, I know that there is a method to the madness, and that that kind of jumble still has to have a plan in order for it to work.

That’s important to remember with this block.  Just because the selected colors go together doesn’t mean they will work well together if they’re in the wrong order.  I discovered this when I made my block.  I laid out four colors and arranged them in color order and was pleased with the result.  Until I sewed it together, and realized I really, REALLY didn’t like the results.  I quickly rearranged the colors and stitched it again.  Much better.  Also, in the interest of full disclosure, except for the starting squares, I didn’t use the templates.  Instead, here’s what I did.

2014-01-31 09.08.39Choosing the first to colors, I used the #4 template to cut two squares, one from color 1 (center) and one from color 2.  I sewed them together and pressed the seam.  Then I measured the length and cut a piece of #2 to length and sewed it across the top edge, and pressed.


2014-01-31 09.11.53I repeated this process for colors 3 and 4, until I had a completed block.


2014-01-31 09.22.59And realized I wanted the yellow I’d used for color #4 to really be the starting point.  So I made it again.


2014-01-31 09.34.18Someday (soon) I’ll have my own house and yard and garden.  And I’m totally going to make my own English Country Garden with a rainbow of flowers.

Railroad #72

Leave a comment

“The Underground Railroad was a network of secret routes and safe houses used by 19th-century slaves of African descent in the United States to escape to free states and Canada with the aid of abolitionists and allies who were sympathetic to their cause.[1] The term is also applied to the abolitionists, both black and white, free and enslaved, who aided the fugitives.”  (wikipedia)

Some of my ancestors were slave owners (something I didn’t learn until I was in my 30s) and some fought in the Confederate army.   Growing up in a small, rural Southern town within a stone’s throw of Andersonville, I had a somewhat skewed historical education about what happened during “The War of Northern Oppression.”  As a teenager, I lived in Utah and heard a somewhat less romanticized version.  And probably more accurate.

One thing I didn’t learn about in school was the theory of the Underground Railroad quilts.  The idea is that safe houses along the Underground Railroad hung quilts with specific blocks or patterns from their windows so the fugitives would know which house to go to.  There is no evidence this really happened, and there are experts who argue both that this did take place and that it didn’t.  Since everyone involved has passed away, there’s no way we’ll know for certain.  But I love the idea of it.  The sight of a quilt in a window, offering the promise of a meal, of comfort.  Of Hope.

Every stitch of this block had me thinking about those slaves and the conductors and untold bravery.

2014-01-31 08.19.49To make the HST units, I cut two strips of contrasting colors, 2 1/2″ wide and 12″ long.  I sewed a 1/4″ seam along both sides.  I then used a small 4 1/2″ square ruler and placed the diagonal line along the bottom seam and trimmed away the right side.  Then I slid the ruler up and matched the line with the top seam, and trimmed along the right edge of the ruler.  I repeated this all the way down the strip, leaving me with my 4 HST units, just waiting to have their seams pressed.


2014-01-31 08.21.57Before I pressed them, though, I took my #3 template, laid it on top of the triangles and trimmed them down to size.  My quilting math skills are still very much in their infancy.  Still, I quite like this method.


2014-01-31 08.40.58To make the 4-patches, I sewed two strips 1 1/2″ wide by 20″ long, then I pressed the whole strip to the dark side  Once pressed, I cut my strip-set into 1 1/2″ segments.  This gave me 10 segments that just needed to be paired up and have their seams nested together to match them up.  A quick bit of chain stitching, a good press, and all my four patches were done.

2014-01-31 08.55.41The block gets laid out with the top and bottom rows going 4-patch/HST/4-patch, and the center row going HST/4-patch/HST.  The light points of the HSTs all point toward the center.  The upper right/center/lower left 4-patches all have the dark fabric pointing to the upper right and lower left.  The two remaining 4-patches point the opposite direction.

Sew the mini blocks together in rows and press the seams.  Then sew the rows together, matching the seam lines, and give it a good press.

2014-01-31 09.00.27I don’t know why I didn’t realize this before, but if you made a bunch of these, you’d have a Jacob’s Ladder quilt.  Ladder, Railroad, no matter what you call it, it’s a striking block.

Puss in the Corner #71

Leave a comment

6527These are my cats, Zoe (black and white) and Tidbit (grey tabby).  Sadly, neither of them is still with me.  I acquired Zoe when she was about 4 weeks old.  Her feral mother had taken up residence in my carport and when she had kittens, she took them up into the attic crawl space.  It was about 100 degrees outside, so I can only imagine what it was in the attic!  Worried about the kittens, my husband crawled through the insulation and rescued three of the four, all hissing and spitting and puffed up as big as they could be.  Which wasn’t very big at all.  Even though she was the smallest, Zoe got between us and her brothers, determined to protect them.  In just a few days, she decided she liked us.  When she was itty bitty, she would sit on my foot when I was getting ready for work, or curl up on my pillow and nuzzle my ear when I went to bed.  She was with me 17 years.

Tidbit was dropped on my parents’ doorstep late on the night of July 3rd.  He was adorable and already housebroken.  When I showed up the next day, my parents told me to take the kitten, or they’d have to send him to the shelter (with all the threats that implied).  I left the decision to my husband, who said we had enough cats.  He played with the kitten all day.  When it came time to leave, I didn’t say a thing.  He looked at me and said, “Oh, fine!” as if I’d been pressuring him all day.  The kitten was such a little thing, my parents had named him Tidbit, and it stuck.  Bits lived to be 16, and left us on Christmas Day, 2012.

At no point in all those years did I ever see either of them in the corner!

This block reminds me of Churn Dash and Wrench.  But it’s an adorable block with lots of possibilities, depending on the fabrics used.

2014-01-31 08.01.53This block gives you another opportunity to fussy cut.  I stumbled across this fabric and fell in love with the richness of the colors.  I also chose to fussy cut the inner halves of the HST units to tie the theme together.  I was fortunate to find coordinating fabric with a directional ribbon look to it for the sides.

To start, sew the HST units together and press the seams flat.  I’ve found that pressing them flat rather than pressing to one side save distortion.

Once the HSTs are done, the block goes together REALLY quickly!


2014-01-31 08.07.12Sew one HST unit to either end of a side.  Sew the remaining side pieces to the center piece.  Give all your seams a good press and trim up the center piece, if needed, to make sure everything stays square.

From here, match the seams and sew the side units to the center units.  Press the seams and then press the whole block well.  Square it up and you’re done!


2014-01-31 08.10.47For me, this one finished right at 6 1/2″.  In fact, it looked so small, I thought I’d have to redo it.  And it had me measuring, trimming all my blocks.  Some of them were so out of measurement I had to remake a number of them.  And it gave me the impetus I needed to get the rest of my blocks made.

Prairie Queen #70

Leave a comment

My husband’s family has been in Utah since it’s founding.  Timothy B. Foote left his home in upstate New York with his wife and a few children and moved to Nauvoo, Illinois where he served as one of Joseph Smith’s body guards.  After Brother Joseph’s death, the Mormons were driven out of the beautiful city they’d built in a swamp, across the frozen Mississippi River in the dead of winter, turning back to see their homes, their businesses, and their beautiful temple all in flames.  They had lost everything but their faith and a few belongings.  Intrepid souls, they began an arduous journey across the open expanse of the prairie, up and over the imposing Rocky Mountains, finally coming down into the Salt Lake Valley.  After getting mostly settled, Brigham Young asked Timothy and his family to move about 100 miles to the south to form the settlement that would become the town of Nephi.  I drove through Nephi just yesterday, and to the west the scenery is much like it must have been when the family arrived: tall native grasses interspersed with sage brush, waving gently in the wind.  When his wife, Rhoda, looked out the window of their log home, did the scene remind her of the prairies they had crossed to come to this place?  Did she look at them wistfully, longing for the lush greens of New York and Illinois?  I know she was the queen of her home.  Timothy built the first home outside the fort he’d helped to build in Nephi.  He moved his family to their home, then took his sons and went hunting.  While he was gone Rhoda moved their belongings back to the house in the fort and had her neighbors help her tear down three of the walls of the cabin.  She didn’t want to live out in the wilds, where the indians could attack at any moment.  Timothy didn’t fight her on it, until there were a few more people, and eventually they did move out of the fort and into their own cabin.  And I’m sure Rhoda’s opinions were taken into consideration this time!

Now that we’re done with today’s history lesson, we’ll move on to how to make this fun block.

2014-01-26 16.03.20 The first thing is to sew one light #19 and one dark #19 together.  You will end up with 8 of them.  Press the seams to the dark side.  Nesting the seams, sew the pairs together to make four 4-patch blocks.


2014-01-26 16.19.13Next, sew the light and dark #3 triangles together to make the corner HST squares.  I pressed the seams open and they seemed to lie flatter.  Measure the #1 square that you cut for the center and take a moment to square up the HSTs and 4-patches to match.  Mine were a little off, and this made matching them up a piece of cake.

The dark corners of the HSTs point toward the center.  For the 4-patches, make sure the top dark corners of the right and left squares point to the upper left, and the top dark corners of the top and bottom squares point to the upper right.

For two of the rows, sew together HST/4patch/HST, press the seams to the center.  For the center row, sew together 4patch/square/4patch and press to the outside

2014-01-26 16.30.50I’m beginning to think this would make a great two color quilt, especially if the colors are alternated.  Or, if you keep the colors the same throughout, it may be a type of tessellation, where the pattern is repeated in the negative space.  Hmm… I may have to consider this for a 2-color quilt.


Practical Orchard #69

Leave a comment

I have a friend who is the most amazing photographer.  Over the course of three years, she traveled the length of Highway 89 from Canada and Mexico, time and again, taking pictures and making friend, hearing stories and then recording them and ultimately publishing them in a gorgeous book.  Check it out!

A few years after publishing her book, Ann and her husband decided to explore a new adventure:  an cider farm in rural Utah.  A cider farm, I have come to learn, is a farm with an assortment of apple tree varieties growing in orchards and pressed (juiced) to make cider.  While I don’t drink alcohol, I do like apple juice and one of these days I’m going to show up on Ann’s doorstep and ask for a sample.  It also helps that she’s right outside a national park, meaning I can get lots of great photographs while I’m in the neighborhood.

When I saw the name of this block, Ann and her orchard popped into my head, and I kept her in mind the whole time I was stitching it.  And I LOVE the way it turned out!

2014-01-26 15.25.59This is a combination of #1 squares and #20 triangles.  Sew together one one #20 light and one #20 dark triangle together, repeat.  Press the seams to the dark side, then place them right sides together, nesting the seams and sew them together to make the center hourglass square for the block.


2014-01-26 15.41.39Next up, sew two rows of dark/light/dark squares.  Press the seams toward the outside.

For the center row, sew light/hourglass/light squares together and press the seams toward the middle.

Nesting the seams, pin the top row to the middle and press, then sew the bottom row to the middle and press.


2014-01-26 15.46.25And just that quickly, your orchard is complete.  I love the simplicity of this block.  But what I really love is that I’ll think of my friend Ann, her intrepid spirit, her wonderful book, and her practical cider orchard outside a gorgeous national park in Utah.

Pine Tree #67 and Temperance Tree #95

Leave a comment

Pine Tree and Temperance Tree are so similar it seems pointless to make two separate tutorials.  In fact, the main difference is the size of the trunk.  Pine Tree is fat, Temperance Tree is thin.

I was intrigued by the name “Temperance Tree”, so I did some checking to see what I could find.

treeoftemperanceThis lithograph was published by Nathaniel Currier (later of Currier & Ives) in 1849.  The trunk is Health.  The limbs are Happiness, Prosperity, Strength of Heart, Strength of Mind.  Beneath the image were the following five scriptures:

Ye shall know them by their fruits – Do men gather grapes of thorns, or figs of thistles? Matt.: VII. 16_ Ho, every one that thirsteth; come ye to the waters, Isaiah, I.V. 1. And be not drunk with wine, wherein is excess. Ephesians V. 18… And if he be thirsty give him water to drink. Prov. XXV 21 And he shall be like a tree planted by the rivers of water, that bringeth forth fruit in his season, his leaf also shall not wither; and whatsoever he doeth shall prosper. Psalms 1. 3..

In the mid-1800s, women began to stand up and and together to defend themselves from the tyranny of men.  They recognized that strong drink caused normally placid men to become violent and abusive.  And normally abusive men could – and sometimes did – kill.  Those behind the temperance movement felt avoiding alcoholic beverage could cause a kinder, gentler environment for women and children, and might even induce some men to attend worship services on a more regular basis.  The temperance movement gained enough momentum in the US to lead to the Prohibition Act of 1920.  This ran through 1933, when it was repealed.  It’s a great idea, really, but not very practical.

2014-01-26 15.01.39I started with the trunk, and sewed 1 background triangle to either side of the trunk and press the seams.  Then sew the #14 triangle to the trunk portion.  This creates a large square that goes in the lower right portion of the block.


2014-01-26 14.55.20Next I made a four-patch by using the two #19 squares and two light/dark HSTs, aligning them so the squares are opposite each other, and the light portion of the HSTs point in to the center.  Following that, I sewed the remaining HSTs into two groups of 4 by 2.  One group must have the light triangles pointing up, the other group pointing down.  Essentially, they point toward the center of the tree.  Sew the four-patch to the top group of HSTs.  Sew the left group of HSTs to the trunk segment.  Finally, sew the top HSTs to the trunk section.  Press all the seams well, give it a good steam et viola!  C’est finis.


2014-01-26 15.08.55Pine Tree on the left, Temperance Tree on the right.  Personally, I like Temperance Tree better.  Which do you prefer?


Homeward Bound: #48

Leave a comment

My mom made a point to take us on a trip each summer.  We went to Yellowstone, Yosemite, Southern California, Oregon, and British Columbia, just to name a few.  Each one of them had something unique about it that set it apart, but all of them had the same thing: that point when we would come around a corner and recognize the mountains in the distance as the ones by our house, and knew that home was just a couple hours away, at most.  It was always a bittersweet moment for me.  Relief to be out of the backseat of our Volkswagen Rabbit, and sadness that the adventure was over.

This block was pretty easy to make, and it’s one of those where I was so focused on making it, I forgot to take pictures.  Fortunately, it’s a pretty easy block to make, so here goes.

The first step is to make four 4-patch blocks using 1 dark and three light #19 squares.  Alternately, sew together 1 dark and  light square, then sew a 2 1/2 x 1 1/2″ rectangle to the pair.  Either way, you get the same effect.

Now it’s time to assemble the rows.  Row 1 is 4 patch, #1 Medium, and 4 patch.  Make sure the dark quarter of the 4 patch points to the top outside (one right and one left.

Row two is three #1 squares: Medium, Light, Medium

Row three is the repeat of row 1, except with the dark quarters pointing to the bottom outside.

Press the seams of rows 1 and 3 to the left, and the seams of row 2 to the right.  When you sew the rows together, you’ll be able to nest the seams, which will make sure your seams are straight


2014-02-23 12.52.07

Mother’s Dream: #58

Leave a comment

Every mother dreams.  Dreams of how her home will be.  Dreams of her children, how many, what they’ll be like.  Dreams are filled with sunlight, hope, and promise.  I have Almost Children.  Six of them.  Five boys and 1 girl, belonging to three different sets of parents.  I am not their biological mother, but they live in my mother’s heart, and while their hopes and dreams for the future may change with every passing year, my dreams for them remain unchanged:  That they may find happiness.  That they may be content in their career paths.  That they may find love to sustain them.  That they may have children who fill them with joy.

2013-10-30 17.23.16Because this block lends itself so well, I took the time to fussy cut the #60 center square, then used a complimentary instead of identical fabric for four of the #59 rectangles.

Sew together 1 light and 1 medium #59 rectangle to make a square.  Make four of these, and press the seams.  To the light half of the square attach a #7 dark triangle, making 4 little house shapes.


2013-10-30 17.39.20Sew two house units to opposite sides of the center #60 square. press everything nice and flat.

Sew a #12 dark triangle to opposite sides of of the two remaining house units, creating large triangle units.

Use pins to hold everything in place while you match up the seams.  Sew the large triangle units to either side of the center strip.  Press it flat.


2013-10-30 17.45.57The progression of colors, per the pattern, is dark outside, light center, and medium around the center square.  Because of the fabrics I selected, I put medium in the center with the light rectangles around it.  Personally, I think the block is very striking the way it turned out.

Older Entries Newer Entries